How to Process Retail Sales Efficiently Using Invent ERP Point of Sale
Learn how to process customer sales, accept payments, issue receipts, and manage retail transactions using Invent ERP POS.
Step-by-Step Process
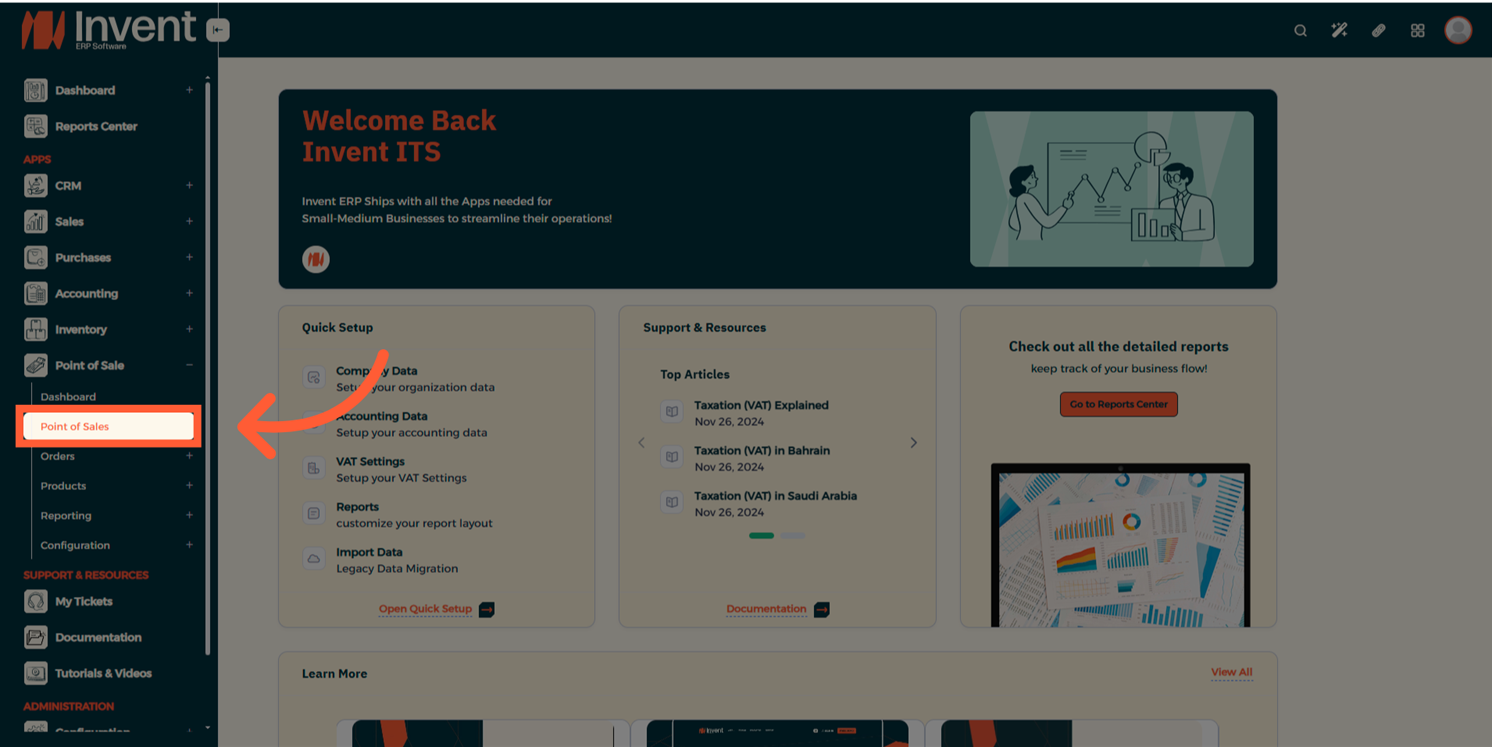
Step 1: Access the POS Module
From the Main Menu, navigate to Point of Sales.
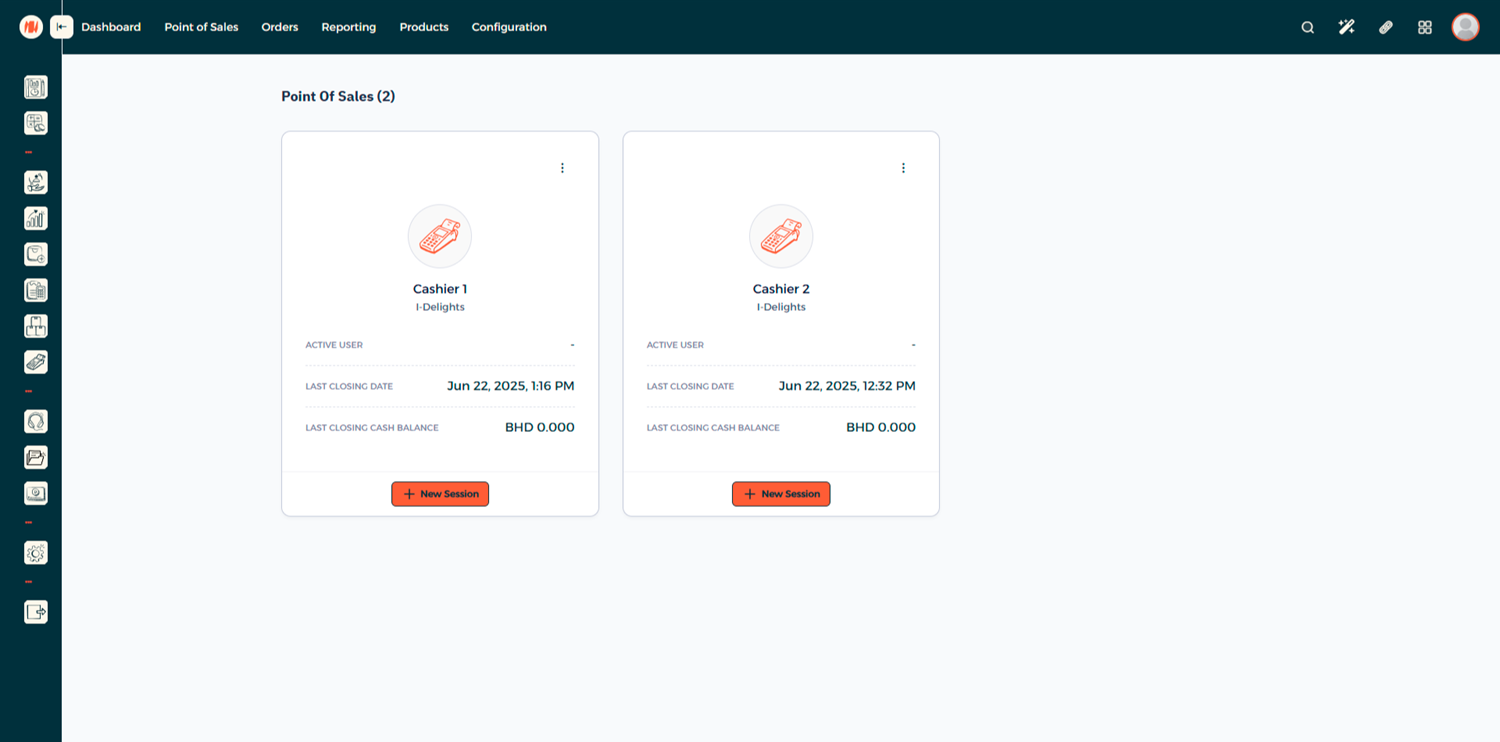
Step 2: Choose the POS Session
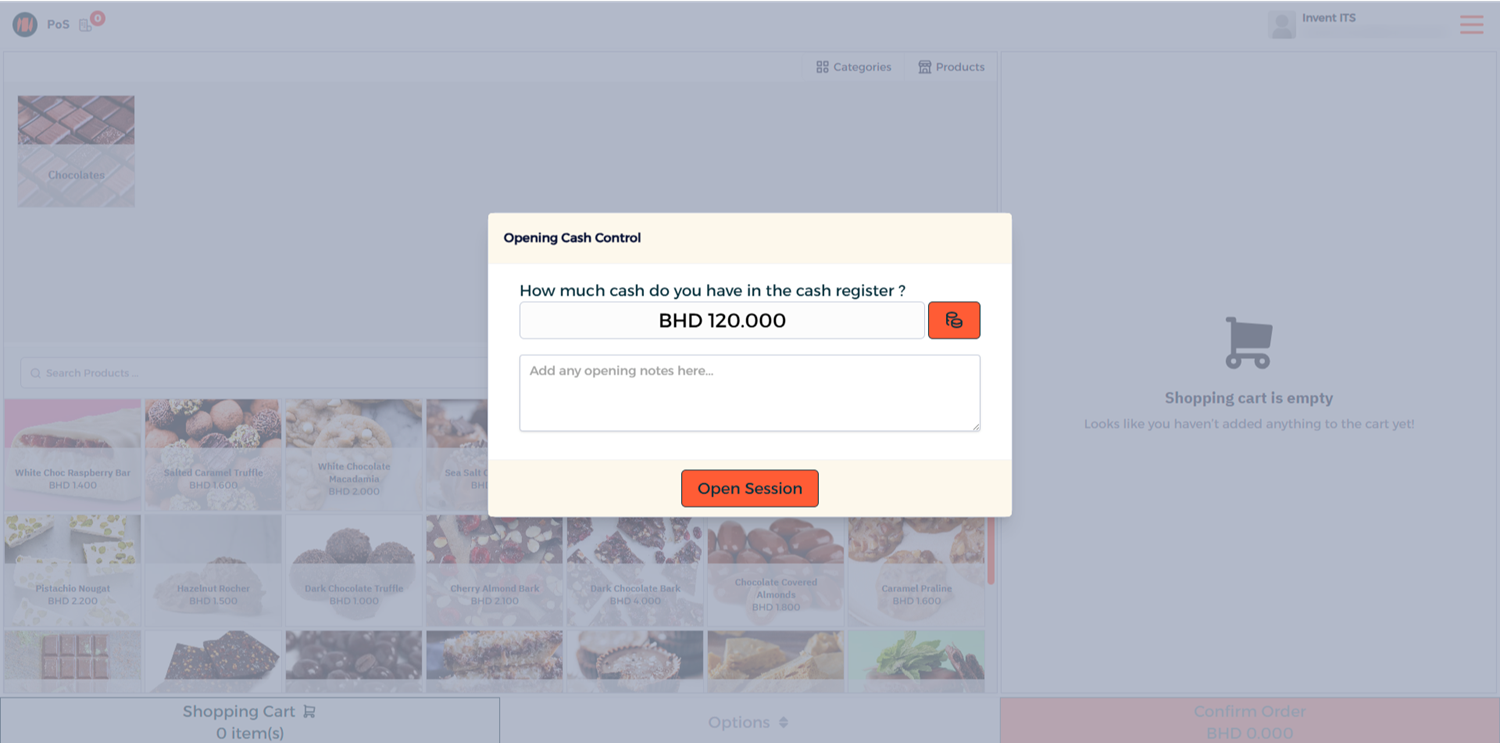
Step 3: Opening Cash Control (Optional)
Enter the amount of cash currently in your register (enter zero if none).
Step 4: Add Products
Use the product search bar, scan barcodes, or search for items to add them to the cart. If you can't find an item, go to the product page and make sure it's marked as Available in Point of Sale.
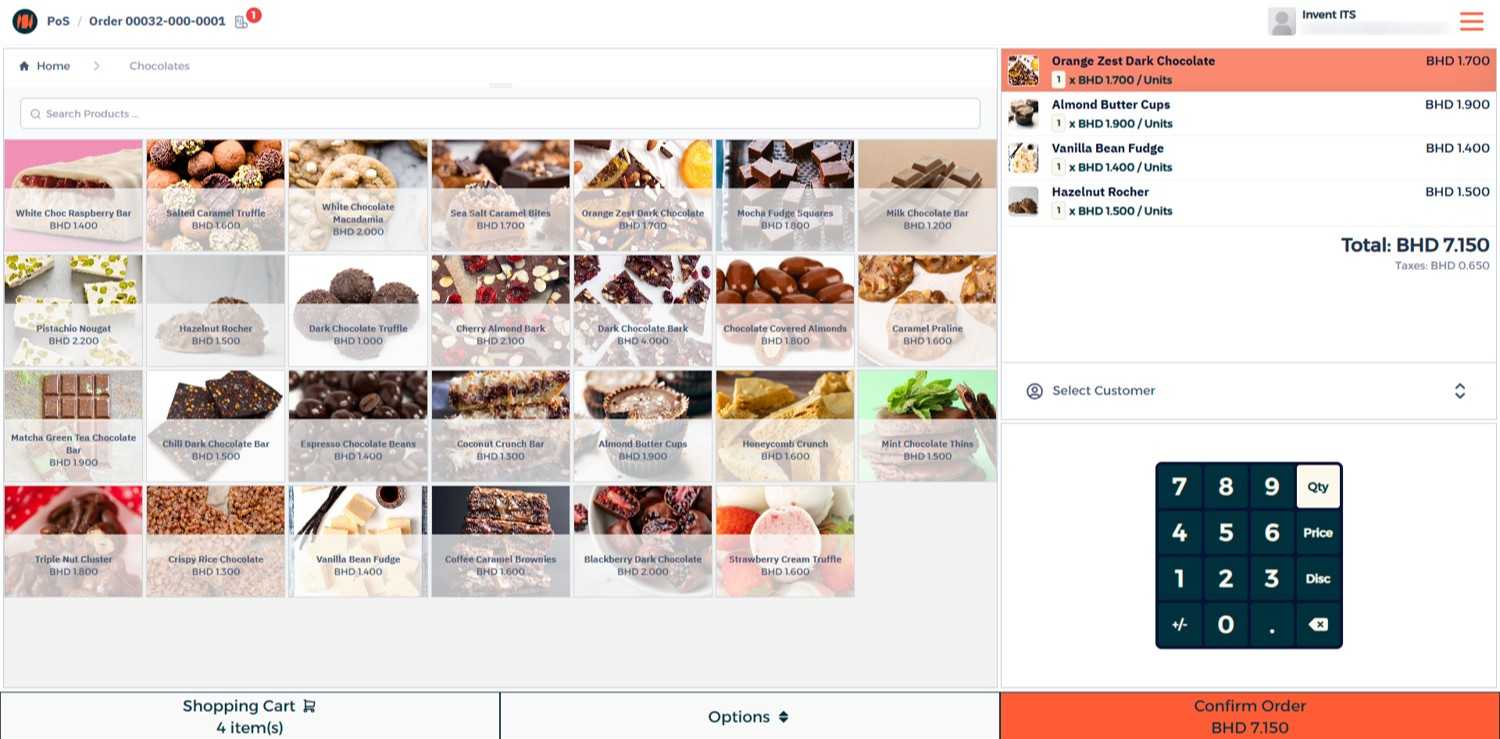
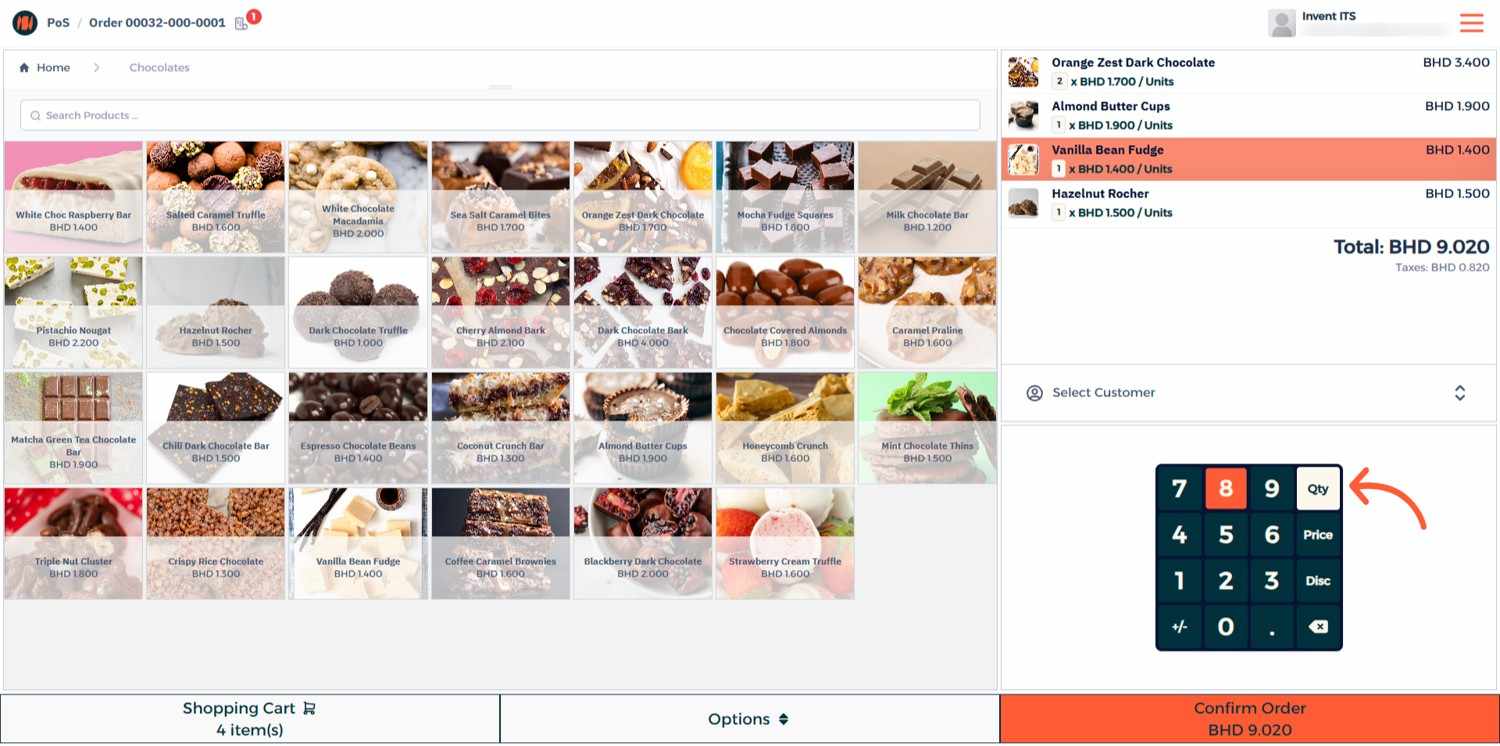
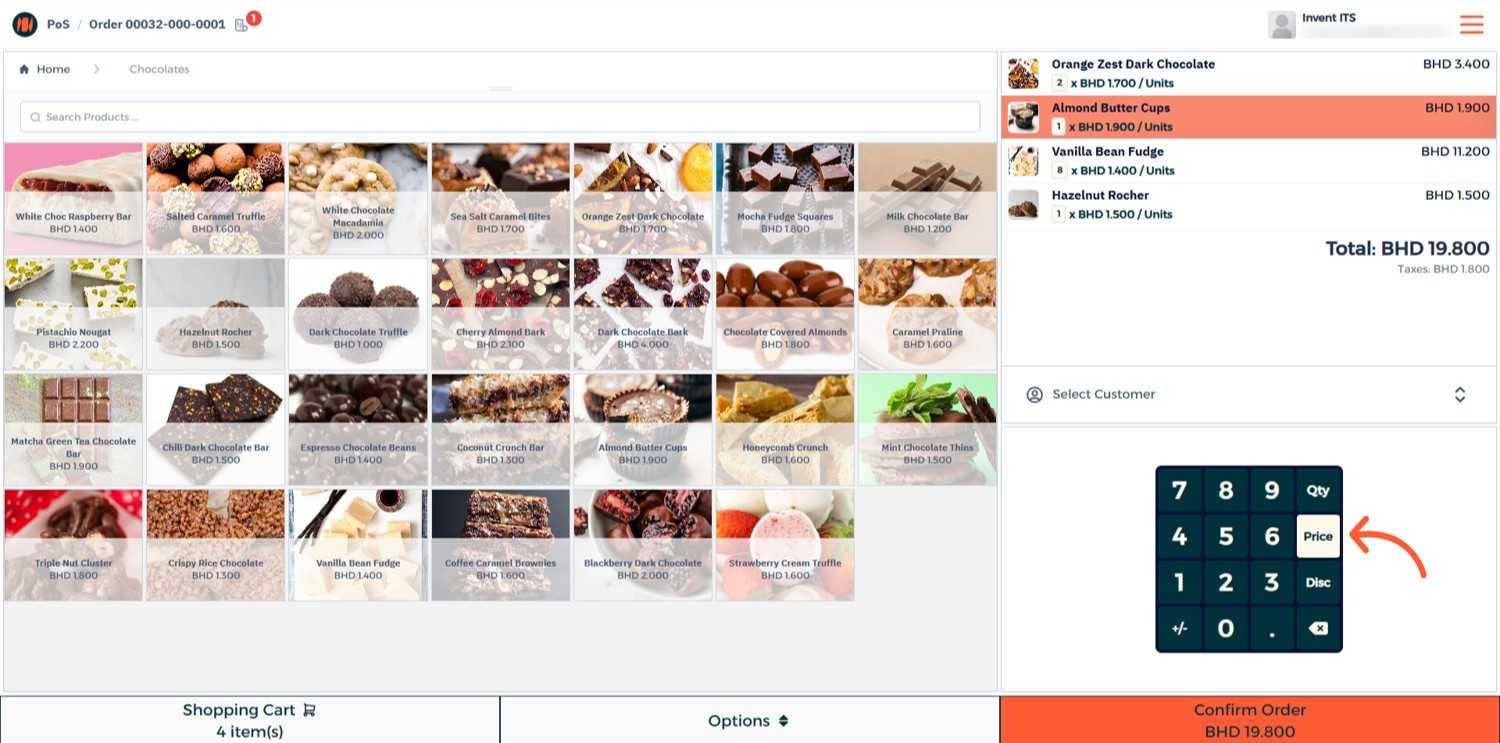
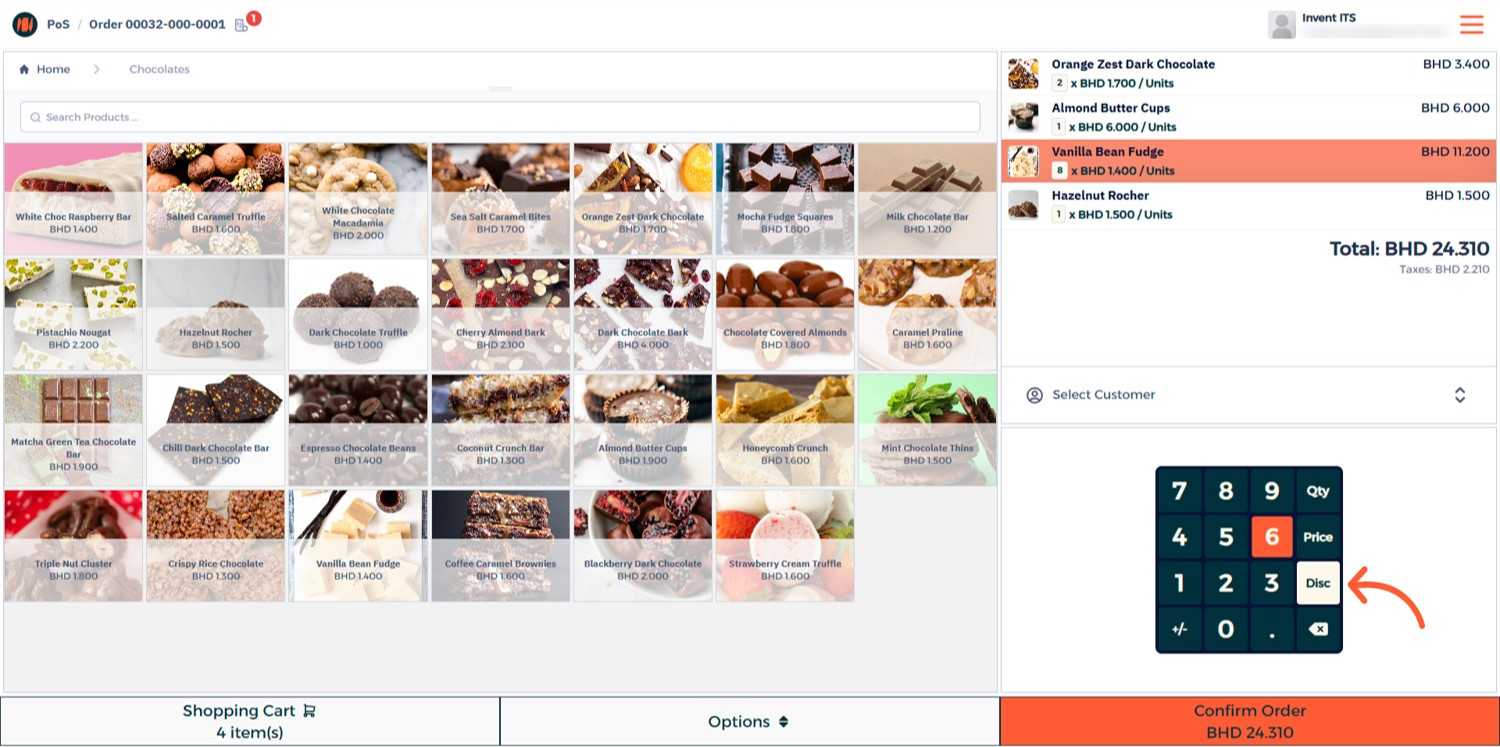
Step 5: Adjust Quantities, Price, or Apply Discounts
Before finalizing the sale, you can change the quantity, change the price, apply a discount, or remove items.
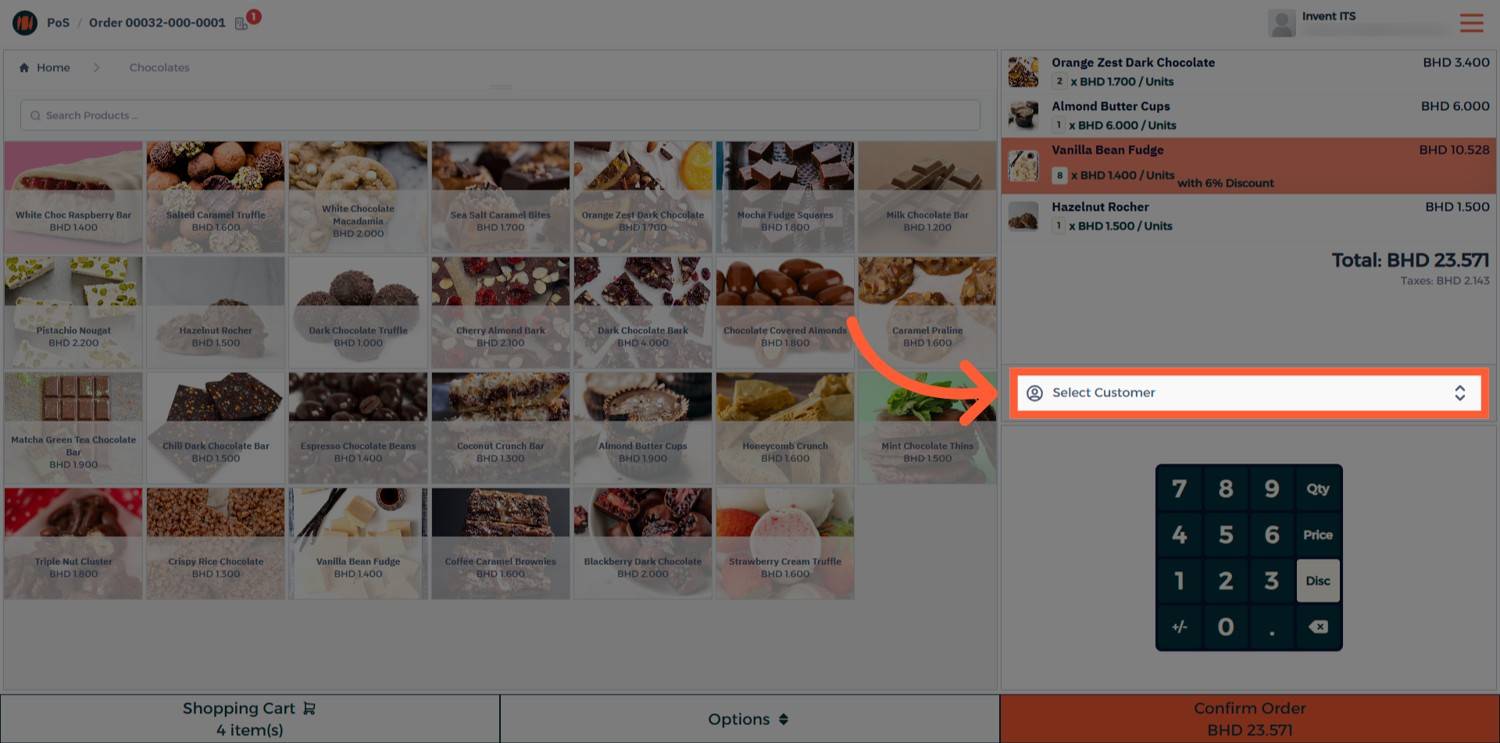
Step 6: Add a Customer (Optional)
You can add a customer to your order if needed.
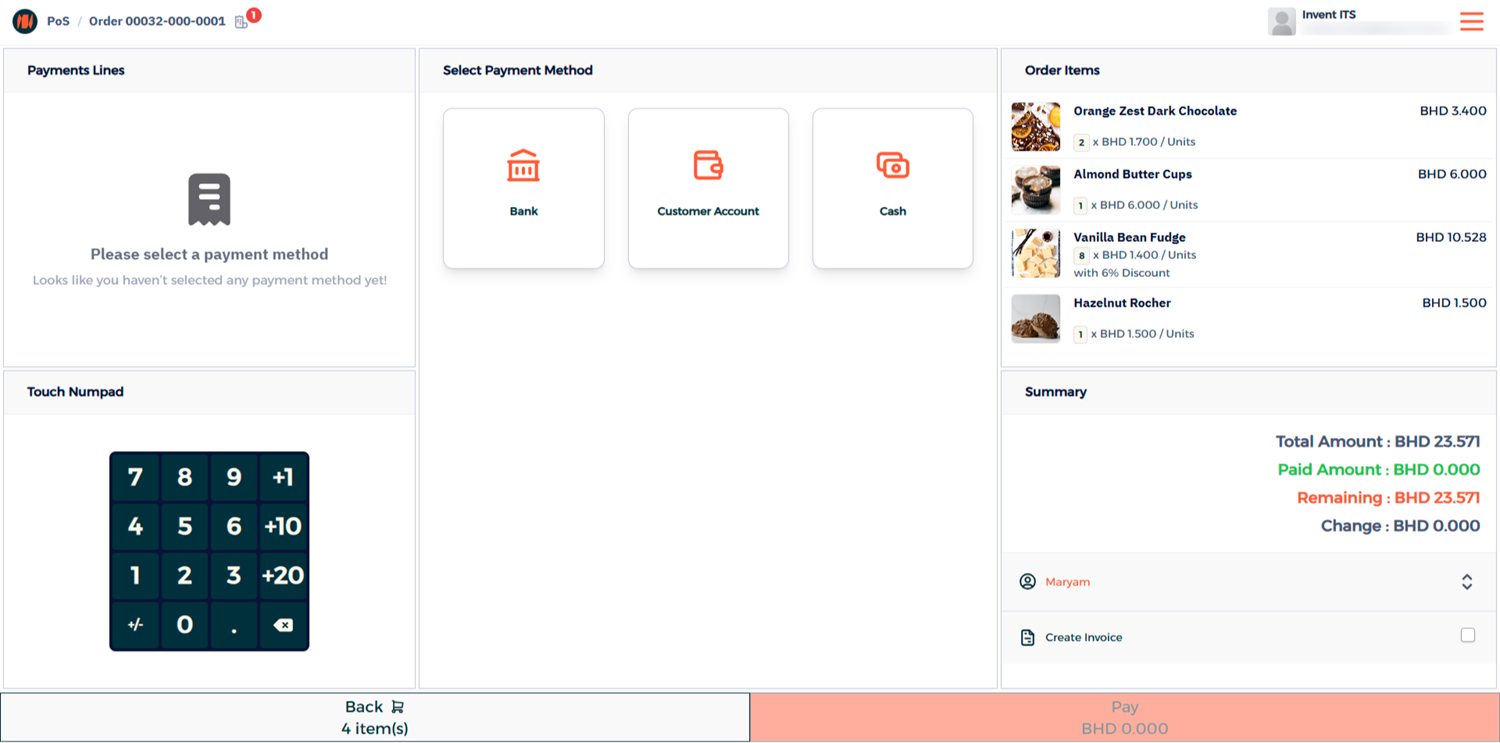
Step 7: Select Payment Method and Complete the Order
Advanced Options
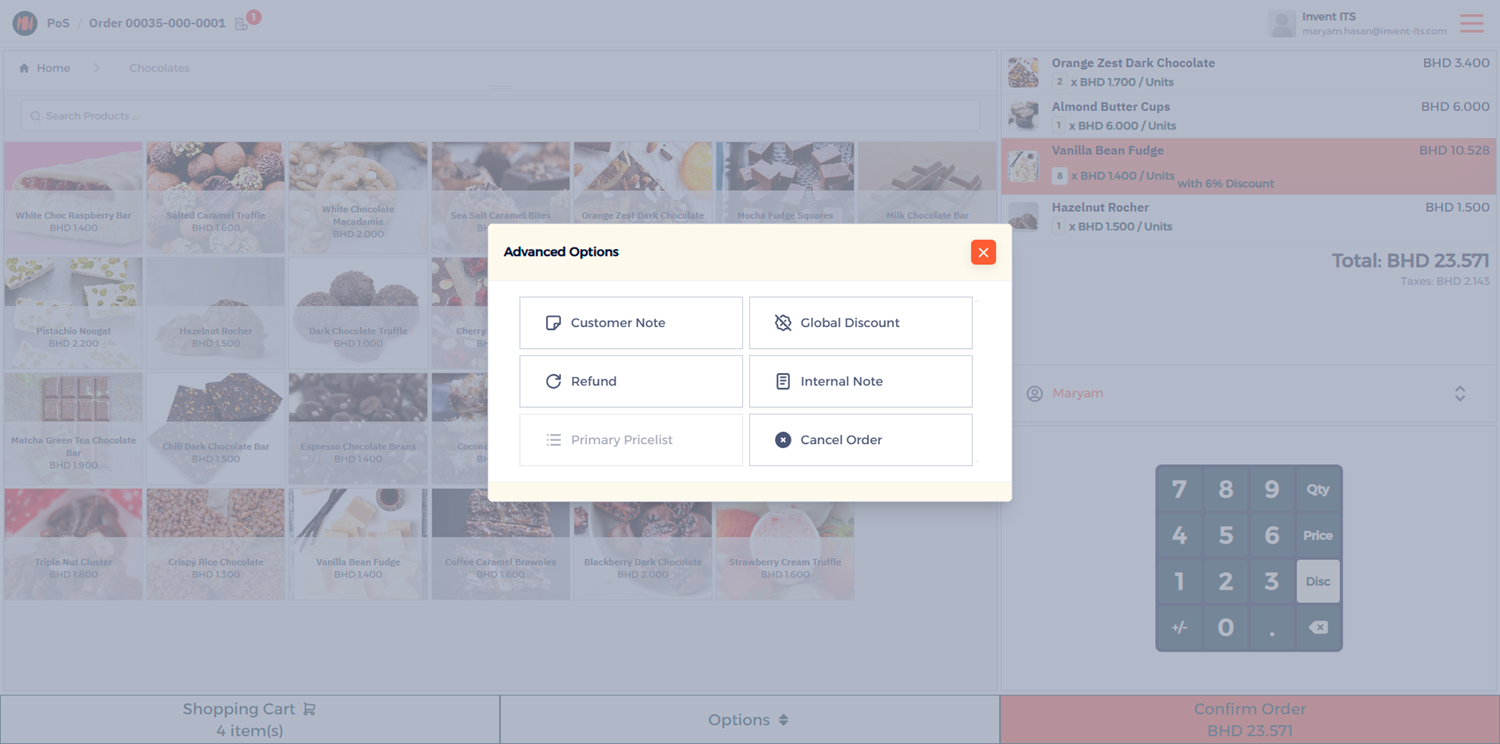
- Customer Note — Adds a note to the customer's receipt.
- Global Discount — Applies a discount to the entire order.
- Refund — Process a refund for a completed sale.
- Internal Note — Adds a note visible only to your team.
- Cancel Order — Cancel an order before completing payment.
Notes & Tips
- Use Barcode Scanners for faster item selection and fewer errors.
- For accurate accounting, always close your POS session at the end of the day.
- Receipts can be customized with your logo and store details for a professional touch
FAQ
Q: Can I track daily sales performance? Yes, you can use the POS Reports section to view daily sales totals, payment breakdowns, and more.
Q: Can I process multiple payments for one order? Yes. The POS allows Split Payments across different methods.
Q: Does the POS sync with the main inventory? Yes. Every POS transaction automatically updates your main inventory, ensuring stock levels remain accurate across all modules.